
i do all my work on a mac. i don't think this really matters, but just putting it out there. i import everything into iphoto, pick which photo i'll use (i take about 6 on a self-timer in the closet every morning) and drag it into photoshop. as far as i know, photoshop is absolutely key for coloring photos this way - if someone knows a way to do it without, let me know and i'll post that, too.

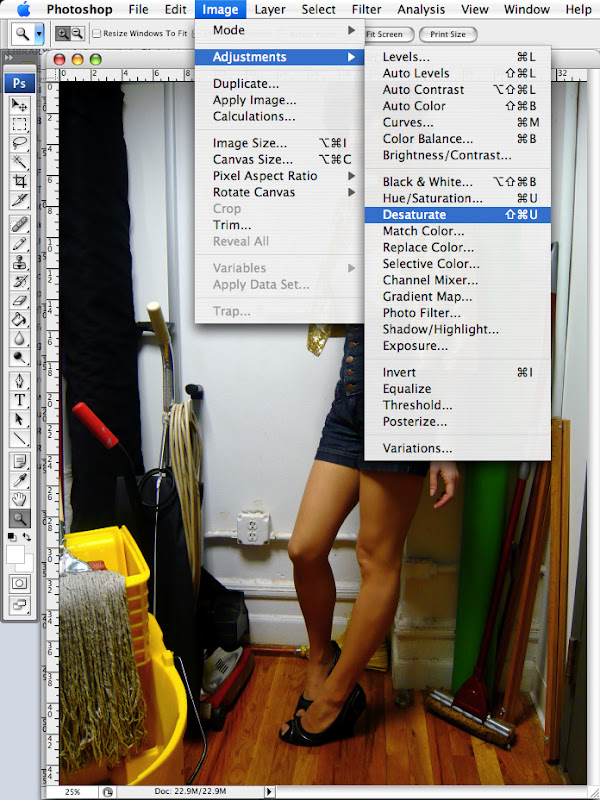
so. i have my photo. i drag it into photoshop to open it there. if need be, you can adjust the auto levels or whatever you want to do to it. then go into the "image" menu, go to adjustments, and select "desaturate."
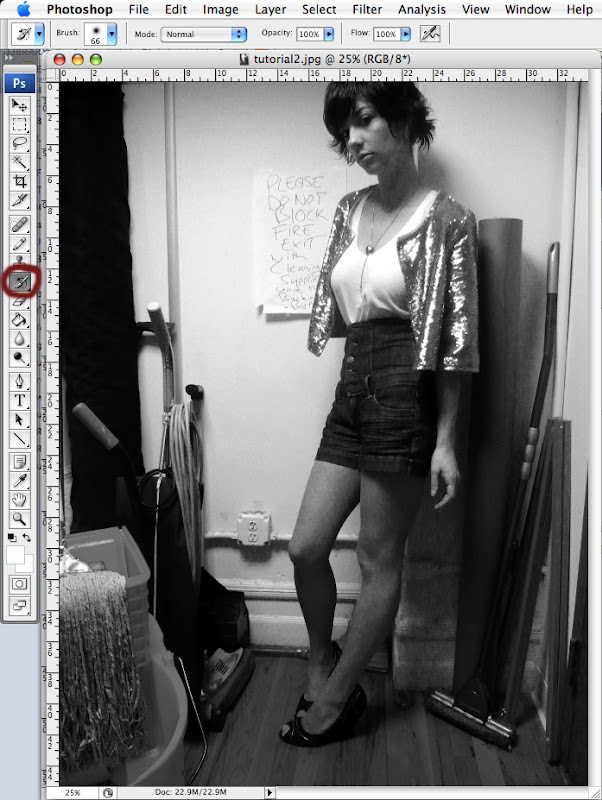
using the "history brush" tool (circled in red in the image above,) you can then essentially "paint back" the colors. it's as easy as that! if you just want your shoes to pop, you can just paint them back, etc etc. the most important thing with this is to have a little patience with it, to blow up the picture a bit so that you can be careful to get the edges cleanly; otherwise you'll look like you're glowing.
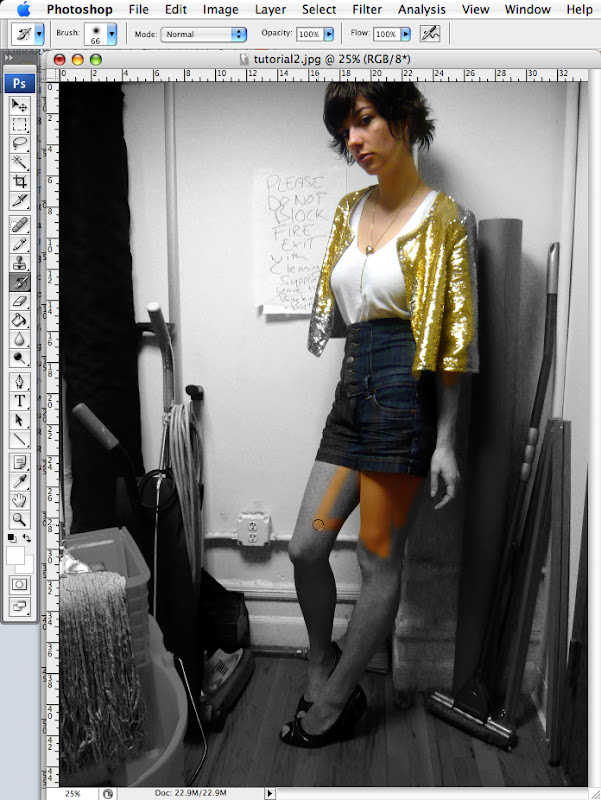
that's it! really a pretty quick and easy process. i didn't finish the photo above, but i think you get the picture. (pun?)
class AGAIN tonight, a make up, and then again tomorrow. . . i am already waiting longingly for the weekend, and a little bit of relaxing.
happy tuesday!
***EDIT! special thanks to Lou!, who left this in the comments as a way to do this without photoshop:
"I thought I'd chime in with my own way of recoloring photos. I use Picasa 3 which you can download from the Google site.
1) Open the photo for editing
2) Click the Effects tab in the panel on the left
3) Select "Focal Black and White"
4) Then adjust the sliders until you've got the size and sharpness you want
5) Position the cursor on the parts you want illuminated
6) Click Apply and Save as normal
It probably doesn't work as good as Photoshop but it's an alternative."
thanks lou!
xo audrey


Oh my god this is brilliant! Thank you so much for sharing. I didn't dare to ask you as I thought it was your own little secret but I'm so glad you did!
ReplyDeleteHi. You have a wonderful blog and I thought I'd chime in with my own way of recoloring photos. I use Picasa 3 which you can download from the Google site.
ReplyDelete1) Open the photo for editing
2) Click the Effects tab in the panel on the left
3) Select "Focal Black and White"
4) Then adjust the sliders until you've got the size and sharpness you want
5) Position the cursor on the parts you want illuminated
6) Click Apply and Save as normal
It probably doesn't work as good as Photoshop but it's an alternative.
hi! I wasn't able to find your email so i thought I would just leave a comment. :) I found your blog on weardrobe, which I was introduced to by the wonderful Jessica of What I Wore. Anyway, I have loved reading your posts and your outfits are awesome. Also, thanks for the PS tutorial...I was just about to ask you about how to do that and then came across the post that explains how! Anyway, just wanted to say keep up the great work...inspiring! check out style pill at MyStylePill.com! xo
ReplyDeleteHey! WhatIWore just linked to this, so I'm seeing it for the first time now.....Thanks for the photoshop tutorial.
ReplyDeleteI don't have photoshop on my computer, but use photobucket's online editing instead (also...it's free!)
I'm a visual learner, so I parroted your tutorial style so I could show you how it works on photobucket.
I just set up a private post on my blog....so if you'd like to see it, you can access it with this link: http://stylefyles.tumblr.com/private/283629758/tumblr_kunvzyn1Oz1qzwvre